Total Recorder merupakan sebuah Software Perekam dan Pengolah Audio Multi Fungsi yang dapat merekam audio streaming, merekam Suara anda menggunakan Mic, atau dari perangkat eksternal Lain yang terhubung ke PC atau Laptop Anda dengan Kualitas Tinggi ,dan masih banyak Fitur lainnya.
Add-ons Total Recorder: Spectrum Analyzer dan Graphic Equalizer , Digital Mixer , Audio Restoration , AGC dan Speech Enhancement Add-on.
What's New In Version 8.3 build 4370 (released on July 15, 2011)
- You can use batch processing to change the audio speed in files.
- If the recording's start time is added to the file tag then you can display the time that a particular position in a recording was recorded.
- Other minor enhancements.
Total Recorder Professional Edition Main Features:
- Record directly in any supported sound format. PCM, MP3, WMA, Ogg Vorbis, FLAC, APE and any format provided by a system codec are supported. Under Windows 7 AAC Audio within MOV (for playback only), MPEG-4, and 3GP containers is also supported. In addition Professional Edition provides support for a number of high-quality stereo formats (PCM - up to 192kHz 24bit and float, FLAC - up to 192kHz 24bit, WMA Lossless - up to 96kHz 24bit, and formats provided by the Windows Media Audio Professional codec). For more information, see the Selecting an Optimal Recording Format Tutorial.
- Capture streaming audio or record local audio files reproduced by other programs, such as RealPlayer, Windows Media Player, iTunes, Musicmatch Jukebox, WinAmp, and others. These recordings are performed without the need for special lines for your sound board and without a loss of quality due to redundant conversions from digital to analog to digital. Many additional options are available. For example, you can use accelerated recording to increase the recording speed or you can choose to suppress Internet transmission gaps. For more information, see the Recording an Internet Broadcast Tutorial.
- Record any sound passing through any line of your sound card with the ability to listen to audio being captured. For example, you can record sound being played back by an external program, or sound from a microphone, an external LP, cassette, CD/DVD player, AM/FM/Satellite radio, etc. For more information, see the Recording from an External Device tutorial.
- Use Total Recorder as a VoIP recorder to record both parties of a VoIP (Voice over IP) calls or an Internet-telephony conversation when using programs like Skype, Google Talk, Yahoo voice, MSN, etc. For more information, see the Recording VoIP Calls and Internet-telephony Conversations Tutorial.
- Background record (i.e. capture streaming audio) an Internet-broadcast in MP3, WMA and Ogg Vorbis formats. This feature allows you to do the following:
– Capure streaming audio (an Internet broadcast) in their original format without decoding and re-encoding.
– Record without using an external player.
– Extract track information from a stream.
You can also slow down or speed up the playback of an Internet broadcast.
- Convert files to any supported format (including on the fly converting while recording). For more information, see the Sound Format Conversion Tutorial.
- Edit sound files using a built-in sound editor. This built-in sound editor allows you to cut, trim, and join your recordings. Editing can be performed using a visual representation of the sound or using clipboard operations. All editing functions are performed without decompressing/recompressing to preserve sound quality and save time.
- Use the time shift feature to listen to the recorded sound while a recording is being made. While listening, you can move anywhere within the recorded part of the sound stream and start playback.

- Split recordings on separate clips. You can indicate that the sound being recorded will be split on separate clips during the recording. File tags can be created automatically.
- Split recordings on separate files. You can indicate that the sound being recorded will be split into separate files during recording based on different conditions (size, duration, low sound level, etc.). Splitting an existing recording can also be done. For more information, see the Splitting and Tagging Files Tutorial.
- Use Cue-sheet files. Total Recorder lets you create cue-points, which can be used for splitting a file afterwards. These cue-points can be created manually, for example to make a bookmark in a sound file. Or they can be created automatically during a recording session (based on pause reduction, changes of the clip information in an external player, etc.) or while capturing streaming audio and information about a track changes.
- Create and edit file tags. Total Recorder can work with file tags for any of the supported media formats. Tags can also include artwork and the recording's start time with the ability to display this timestamp.
- Play a media file at a slower or faster speed than normal while optionally preserving the original tone.
- Schedule playbacks or recordings using Total Recorder's powerful built-in scheduler. For example, you can schedule a recording and use a stop condition such as an absolute time, a duration, the absence of a sound signal, and so on. The scheduler includes many other options. For more information, see Using the Scheduler Tutorial.
- Normalize recordings to adjust the level of sound. Normalization of MP3 files is performed without re-encoding or any loss of quality.
- Perform general operations on playlists, such as merge multiple files in a playlist, rename files from a playlist using tag information, save a playlist, etc.
- Favorites are supported by Total Recorder. Favorites provide a faster and more convenient way to open a file, playlist, or URL. You can organize your Favorites list, use predefined sample links, and export and import Favorites.
- Put your computer in standby or hibernate mode when an automatic job completes.
- Perform batch processing. You can use batch processing to convert, normalize, split, rename, tag, change speed, apply add-ons, or perform other operations on multiple files. For more information, see the Batch Processing Tutorial.
- Save an audio file with a different speed than the speed with which it was recorded. This can be useful, for example, when you have recorded a news transmission and you want to listen to the recording at a faster speed.
DiSitusnya untuk mendapatkan yang Full Version anda harus membayar sebesar
$35.95,Tapi Di InternetTeknologi.Com anda akan mendapatkan secara Gratis.
Extract,Install File bernama Setup InternetTeknologi.Com sampai selesai,lalu restart PC .
Total Recorder jangan di buka dulu
Copy File bernama TotalRecorder
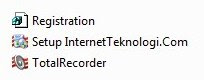
Pastekan Di C\Program Files\HighCriteria\TotalRecorder
Jika Muncul pesan pilih saja Copy and Replace

Klik Double pada File bernama Registration diatas,klik yes terus sampai muncul pesan Sukses seperti berikut.
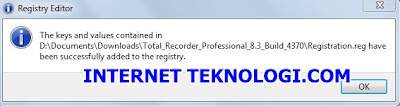
FINISH
Cara Menggunakannya
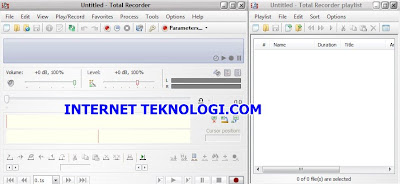
Buka Total Recorder Professional Edition 8.3 Build 4370
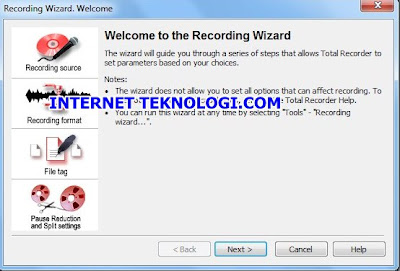
Muncul Wizardnya seperti dibawah ini
Klik Cancel
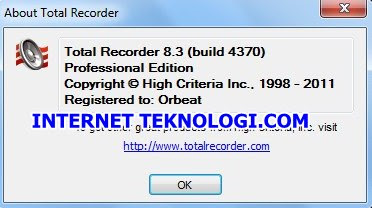
Klik Help About
Sudah Registered to Orbeat,Klik OK
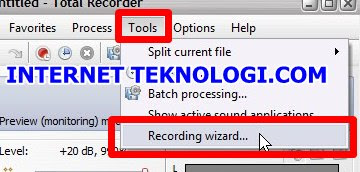
Buka Wizard lagi,klik Tools>>Recording Wizard
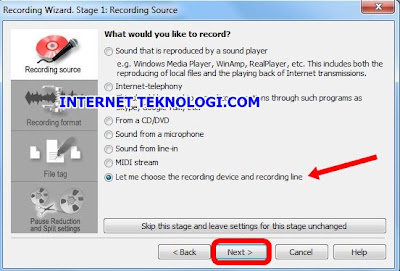
Klik Next
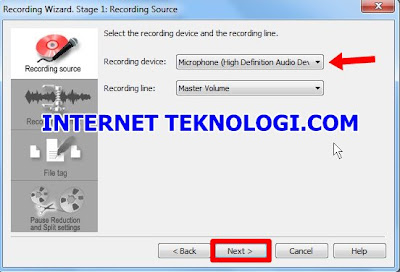
Pilih Let Me Choose The Recording Device and recording line
Klik Next
Pilih Microphone PC anda pada Recording Device
(Jika belum menggunakan Microphone external,Langsung Klik Next)
Klik Next
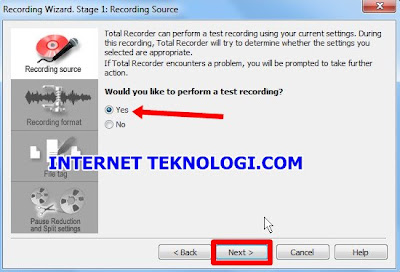
Pilih Yes untuk Test Suara masuk melalui Micrhone Laptop atau External anda
Klik Next
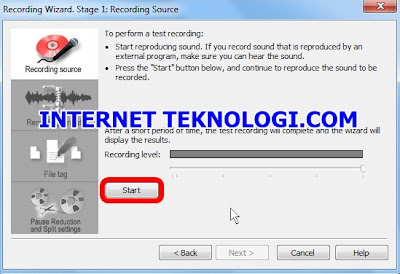
Klik Start,lalu silahkan anda test Bicara/Keluarkan suara anda di dekat laptop atau melalui Microphone anda dengan keras sampai warna hijau muncul di Recording Level (Jika suara yang masuk kecil akan muncul pesan problem,pilih saja ignore proble>>Next Recording wizard)
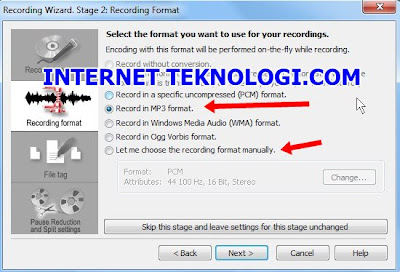
Jika ingin dalam Format stndar pilih saja Record in MP3 Format. (
jika ingin suara lebih besar pilih Let me choose the recording format manually>>klik Change>>silahkan pilih ukurannya>>Klik OK)
Klik Next
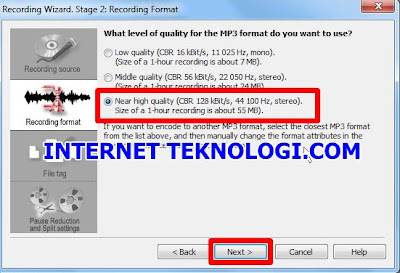
Jika diatas anda pilih Format MP3 maka muncul pilihan Qualitas MP3 seperti berikut,pilih saja Near high quality
Klik Next
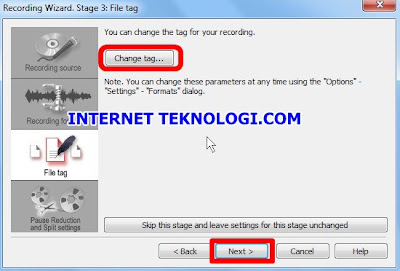
Jika ingin mengatur Nama album,Judul lagu,Artis,silahkan klik Change tag
Jika tidak ,klik Next
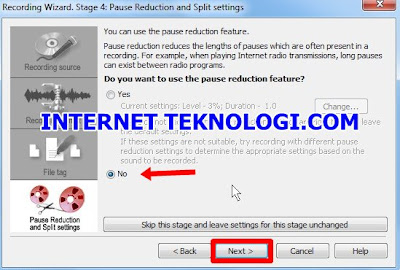
Pilih No
Klik Next
Pilih No
Klik Next
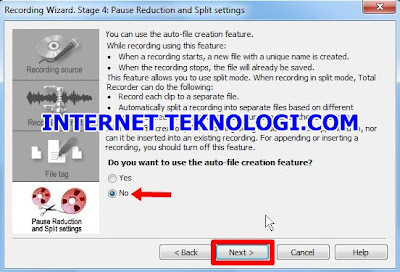
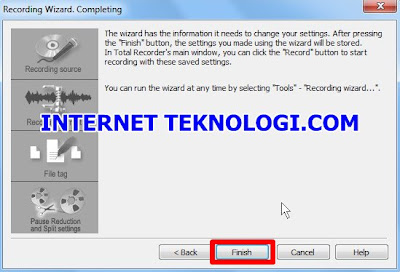
Klik Finish
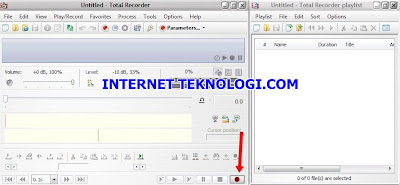
Coba tes rekam suara anda
Klik tombol Record
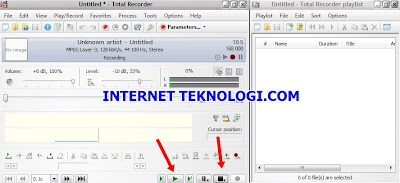
Klik tombol stop ,lalu klik tombol Play
Silahkan
Download Total Recorder Professional Edition 8.3 Build 4370 Terbaru Full Version Rilisan 15 Juli 2011 Disini 


 Edit paths by nodes (F2) untuk mebuat bangun kotak tersebut agak rounded (tidak bersudut)

 untuk menTRANSFORM (mengecilkan, memperbesar, memutar, atau memindahkan object)
 atau bisa juga tombol F8


 atau tekan ( P )


